Fence Installation is a significant home improvement project that involves careful planning. This includes setting a budget, choosing the right materials, complying with building codes, and considering maintenance requirements.
It’s also important to know your property lines and have a professional surveyor mark them so the fence won’t infringe on neighbors’ property. Other considerations include staking out utilities to avoid damaging them during construction and scheduling when utility companies work in your area.
Before installing any fence, it’s important to choose the right materials. A variety of options are available, from classic wood to low-maintenance vinyl and sturdy metal. Each type offers its own unique benefits and drawbacks. Wood provides a natural look that blends into the landscape, while vinyl offers durability and minimal upkeep. Metal fences offer superior strength and security, but are often less visually appealing than their other counterparts. Choosing the best material depends on your specific needs and preferences, as well as your budget.
A quality fence is not only essential for enhancing your home’s curb appeal, but can also improve your property’s value. To make the most of your investment, consider your long-term goals for your backyard and consult with professionals to ensure your chosen materials meet your needs.
It is also important to discuss your plans with neighbors, especially if the fence will border their property. Not only can this reduce potential disputes, but it may help you establish cost-sharing arrangements. It’s also a good idea to check with your local zoning laws, as some communities require that fences be constructed of certain materials or adhere to set height restrictions.
If security is a priority, you may want to opt for a metal or chain-link fence. These types are highly effective for protecting your property from intruders and can be customized with decorative features. However, they are not ideal for privacy purposes, as they are more visible from the street than other types of fencing.
A high-quality fence can be a significant expense, but it’s important to consider your long-term investment. Investing in durable, low-maintenance materials will save you money in the future by reducing repairs and replacement costs. A professional installation is also an excellent way to save on upfront costs and avoid costly mistakes that can lead to expensive repairs or replacements in the future.
A professional installation is generally more affordable than a DIY project, as the hourly rate of a qualified contractor is much lower than the labor market price for an unskilled worker. In addition, the expertise of a professional can ensure your fence is built correctly and efficiently.
Digging the Posts
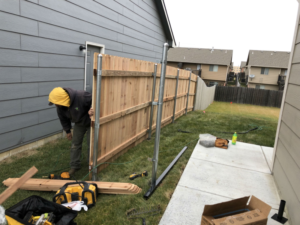
Once you have a good idea of the layout for your fence and have reviewed local building codes for post size, style and location, it’s time to start digging. Posts are the backbone of any wooden fence and need to be set securely in the ground for long-term stability. A fence that isn’t firmly anchored to the ground can easily be blown over or damaged by storms and wind. Professional fencing services use effective installation methods to ensure posts are buried properly in order to prevent such problems.
The most important aspect of digging fence posts is how deep the holes need to be. The depth of a fence post hole depends on a number of factors, including the height of the fence and the frost line depth in your area. It’s also a good idea to check with your municipality about any restrictions on digging hole size.
Generally speaking, a hole for a fence post should be twice as wide as the diameter of the post itself. This allows for proper drainage and prevents water from pooling around the base of the post, which can cause rot. The hole should also be deep enough to ensure that the bottom of the post is below the frost line.
Once the post is positioned, it’s often necessary to brace it temporarily with stakes or another piece of wood. This will prevent the post from moving while concrete sets. It’s also a good idea at this point to check with local utilities companies for any underground lines that may need to be marked before digging.
It’s recommended that you use a fast-setting concrete to set the posts, as this will save time and money over a traditional concrete mixture. Follow the manufacturer’s instructions for curing times and conditions to achieve optimal results.
Some people choose to drive their posts instead of using concrete, and this is a viable option in most climates and soil conditions. However, it’s important to drive posts properly to avoid sagging and structural damage. A well-driven post will last longer than a concreted one, and it’s much easier to remove and replace a driven post than it is to pull out a concreted post.
Attaching the Panels
The fence installation process is a large undertaking that requires planning, scheduling, and addressing unforeseen challenges. With proactive involvement, homeowner’s can ensure that their fence installation projects run smoothly and produce the results they expect. By setting project milestones and communicating regularly with installers, homeowners can stay updated on progress and anticipate when their projects will be completed.
Once the foundation has been established, it’s time to erect the fence panels. Depending on the type of fence, this may involve fastening individual panels or connecting pre-assembled sections of fencing. Careful attention is paid to ensure that the panels are properly aligned and attached to the framework for a visually appealing finish.
Before securing each panel, a spirit level should be used to check that the fence is level. Once it is, a galvanised nail should be hammered into the pilot hole in each batten framing to secure it to the post. Alternatively, fence clips can be used to help keep the panels firmly in place. If you are using these, be sure to countersink the screws or use galvanised nails to prevent splitting and rusting.
After the panels are secured, gravel boards can be fitted to protect the wood from water and other elements. It is also a good idea to treat the fence with a water-resistant wood preservative to further protect it from the weather.
Once the fence structure is in place, gates can be installed to provide access points into and out of the enclosed area. Other features like decorative elements and latches can be added to enhance the appearance of the finished fence.
After the final touches have been applied, a walkthrough and inspection of the new fence is conducted to make sure that it meets the homeowner’s expectations and to address any outstanding concerns. With careful preparation, communication and planning, a quality fence can be a beautiful addition to your property that will last for years to come. This will give you peace of mind and privacy in your home, as well as protect your children, pets, and crops from predators and other trespassers.
Attaching Post Caps
Post caps may seem like a minor detail that’s not worth the trouble of installing them, but they provide vital protection for your fence posts. Without them, the end grain of the wood is exposed to moisture that can lead to rot and mildew. Post caps shield that part of the post from rain, snow, and sun exposure. As such, they extend the lifespan of your fence.
Another important function of the post cap is that it protects the ends of your fence posts from being scratched or nicked by tools, vehicles, or other objects. If the fence posts are not protected, the wood will begin to deteriorate or become damaged, requiring them to be replaced sooner. Post caps prevent this from happening and make the overall installation of the fence much easier.
Before you start installing the post caps, prepare them by sanding or grinding down any rough edges. You should also apply a coat of carpenter glue or outdoor deck screws to the top surface of each one. Once the adhesive is applied, let it set as per the manufacturer’s recommended time frame.
When installing the post caps, it’s a good idea to use a pre-drill hole through the center of each one so that you can install an outdoor deck screw or carpenter glue through the hole and into the fence post below. After the screw or glue is installed, allow it to set for a little bit so that a strong bond is created between the post and the head of the screw/glue.
Once the glue or screws are in place, carefully align each post cap over the top of a fence post. Make sure it’s straight and centered, then press down on it with even pressure so that the adhesive spreads uniformly beneath the cap. Let the post cap set for a minute or two so that it’s well-secured and won’t be easily knocked off.
Once the post caps are in place, they’ll provide a nice finishing touch to your fence. Plus, they’ll give the entire project a more professional/sophisticated appearance. The fact that they help to protect the posts from animals and bad weather conditions is an added bonus.