What Is a Pool?

A pool is a body of water that can be used for swimming and other leisure activities. It can be built in the ground or above ground.

The depth of a pool depends on its purpose. If a pool is meant for swim laps, it should be at least 3.5 feet deep. It is also important to consider the height of swimmers when determining the pool depth. Contact The Woodlands Pool Company now

The pump is the heart of a pool’s circulation system and plays an important role in keeping your water clean. It pulls the water from the skimmer and main drain, pushes it through the filter and then returns it to the pool through the main return lines. It also aids the heater in circulating the warm water to all areas of the pool, making sure that everybody gets the chance to swim comfortably.

The speed at which the motor operates is really important as it determines how clean your water stays and how much energy it uses. A high-speed pump will keep the water clean very quickly, but running it at this pace all the time can be wasteful of energy. Most modern pumps use variable-speed technology, which allows them to adjust the operating speed to match different tasks like regular cleaning and filtration or running water features.

Choosing a pump with an efficient permanent magnet motor will save you both energy and money. These are similar to the motors used in MRI machines and electric cars. They have no brushes and require less maintenance than traditional motors.

It’s important to have enough airflow around the pump and to make sure that it is free of weeds, grass, dirt, leaves or other debris. This will ensure that it can breathe properly and avoid any problems with the O-rings or gaskets. These little components can cause major problems if they are damaged.

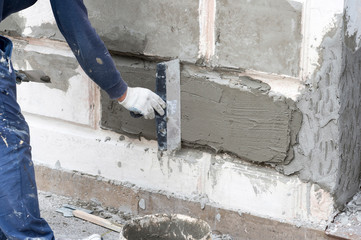
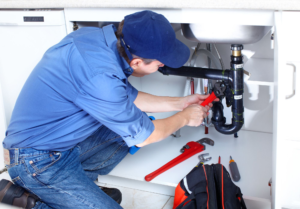
It’s a good idea to get a qualified swimming pool serviceman or electrician to install your pump. A poor installation can cause electrical hazards, which may lead to serious injury to swimmers. It can also result in costly damage to the pump and other equipment.

Filter

The filter is a crucial piece of pool equipment that secures healthy swimming conditions by catching debris and microbial particles from the water. It also helps ensure proper chemical distribution throughout the pool. This system is plumbed into the pump and runs in a continuous cycle. This cycle draws water from the skimmers and vac lines into the pump, which then passes through the filter. The filtration material in the filter, like sand or DE, will then catch any dirt or trash before it is pulled through the outlet pipe back into the pool.

Clean filters help the pool keep the correct chemical balance, which is essential for swimmer safety and water quality. Maintaining the right level of chlorine and other chemicals reduces the risk of eye and skin irritation, prevents algae growth, and protects the equipment from damage.

Inspecting and maintaining the filter on a regular schedule will help prevent problems before they occur. This includes checking the pressure gauge readings and cleaning or replacing parts as needed. Maintaining a regular routine will not only improve the performance of the filter, but it will extend its lifespan as well.

A high pressure reading on the filter gauge indicates that the filter is becoming clogged and requires cleaning through backwashing. This is an important part of pool maintenance and should be done regularly to avoid the onset of more significant issues such as leaks or pump damage. In addition, it is important to understand when to call in a professional to handle complex or difficult filter issues. This may include repairing or replacing the filter’s valves, gaskets, or O-rings. Attempting to tackle these issues without the proper knowledge and tools can result in further damage or costly repairs.

Heater

Swimming in cold water can be very uncomfortable, and a pool heater helps to extend your swimming season and allow you to dial-in the perfect temperature for everyone. Pool heating also has therapeutic benefits for individuals with certain medical conditions.

There are two primary types of pool heaters, gas and electric. Gas heaters heat your pool by burning propane or natural gas, similar to a hot water heater in your home. They have the advantage of being able to rapidly raise your pool water temperature and are often the best option for pools on vacation properties or other locations where the pool will be used intermittently. They do require a gas line and a tank of propane or natural gas, and are therefore a little more expensive to operate than electric heaters.

In comparison, electric heaters (also known as heat pumps) leverage warm ambient air to heat your pool water. They have lower upfront costs and operating expenses than gas heaters, especially in warmer climates.

It is important to have your gas pool heater properly inspected and maintained on a regular basis by a qualified professional. A simple issue like a cobweb in the combustion chamber or an improper gas pressure setting can cause a failure of the heater and result in costly damage to your pool. In addition, gas pool heaters are usually a bit more complex to repair than other pool heating systems and as such should only be repaired by a qualified technician. Fortunately, many utility companies now offer what is called “budget billing” for pool heaters and other large energy usage appliances, which can help to spread out the spiked utility costs over a year instead of paying them all at once.

Lights

When paired with the right pool features, lighting can transform your backyard into a stunning evening destination. From bright LED lights that change colors to submersible fixtures that create a soft glow, the options are endless. But no matter which type of light you choose, it’s important to maintain regular light maintenance. This includes regularly checking the bulbs for signs of wear and tear and replacing them immediately if necessary.

In addition to enhancing the aesthetics of your pool, proper lighting can also improve safety by making it easier to navigate steps and edges after sunset. It’s also important to make sure that all pool lights are properly sealed so they don’t leak inside of the water.

LEDs are becoming increasingly popular in swimming pools, due to their long lifespan and low energy consumption. They are also easy to customize to match your mood or event by adjusting the color temperature and setting up strobe and rainbow effects.

Aside from LEDs, other options include halogen and fiber optic lights. Halogen lights are more durable and work well for lighting up a large area, while fiber optic lights can create a beautiful starry effect in your pool.

However, when deciding on the right pool light for your home, consider the amount of maintenance required. Some recessed lights are easy to replace, but surface-mounted ones can be harder to access. If your current light runs to a pull box in the backyard, you might be able to unscrew it from the surface to change the bulb without having to drain the entire pool. If you opt for a flush-mounted light, however, you’ll need to consult the manufacturer’s manual or contact a professional to change it out.

Cover

Using a cover prevents leaves, twigs, dirt and sunlight from entering your pool, reducing your maintenance and chemical usage. A safety cover also prevents swimmers from slipping into the water, making it easier to find and rescue lost children or pets. These benefits make a cover a vital investment for owners seeking cost-efficiency and environmental responsibility.

Solid or mesh safety covers provide an effective barrier that keeps debris out while allowing water and some light to pass through. These types of covers are popular in wet, snowy areas and can reduce water loss through evaporation by up to 60%. They are typically easy to install and remove, making them a great choice for pools with limited space or seasonal use. However, they are not as sturdily built as other options and may be more susceptible to damage. Additionally, fine airborne dirt can filter through a mesh cover and can lead to murky/cloudy water upon opening. Loop Loc and Merlin have improved their mesh designs to combat this issue, so a Mesh Cover is still a viable option.

An automatic cover creates an insulating seal that is pulled across the surface of your pool by an electric motor and operates along tracks on top or underneath the pool decking. Unlike a manual cover, an automatic cover is easy to operate with the touch of a button. Although they are more expensive than other types of covers upfront, their long-term efficiency and convenience makes them a worthwhile investment for many pool owners. It is important to prioritize durability when selecting a pool cover, as it will be exposed to varying weather conditions throughout its lifespan and should be periodically maintained.

The Importance of Towing

Phoenix Towing is a service that assists drivers who break down or are stuck on the road. It is available 24 hours a day and can be very helpful in emergency situations.

When choosing a towing company, it is important to read reviews and compare prices before deciding. This will ensure you get the best possible service for the lowest price.

The availability of towing services provides drivers peace of mind. These companies can help with a wide range of issues that may occur while driving, such as flat tires, lockouts, dead batteries, and more. The towing service will send out a truck with a trailer or another vehicle equipped with the proper hitching system to connect and haul the load safely.

Towing is a common method of transporting vehicles, but it also has a variety of uses in different scenarios. From assisting breakdowns and accidents to facilitating the transportation of boats or campers, towing is an essential service for many people. It is also a useful way to move vehicles over long distances without accruing mileage or wear and tear.

There are various types of towing services, ranging from light-duty to heavy-duty. Light-duty towing involves the use of wheel-lift or flatbed tow trucks to transport cars and other small vehicles for short distances. Heavy-duty towing is reserved for larger vehicles, such as buses and semi-trucks. These tow trucks are equipped with rotator gear towing mechanisms to pull these vehicles.

A towing capacity chart can be a helpful tool when determining the maximum amount of weight a particular towing vehicle can haul. These charts can be found in the owner’s manual of most car and truck models, and some manufacturers maintain their own online tools to determine a vehicle’s towing capacity based on its equipment package.

Towing laws are a vital part of our society, providing consumer protection and safety. These laws regulate the maximum fees that towing companies can charge, along with regulations on impound and storage policies. They also provide guidelines for releasing towed vehicles to their owners, preventing unfair towing practices and ensuring fair treatment for consumers.

Safety

When you need roadside assistance, you’re trusting a tow truck driver with your most valuable possessions. These selfless first responders must abide by strict laws and regulations to ensure the safety of themselves, other motorists, and the environment. Towing safety measures include regular equipment inspections, comprehensive training, securing loads correctly, adhering to weight limits, and emergency preparedness. These efforts mitigate potential hazards and improve overall operations.

Towing services are responsible for a wide range of roadside tasks, from assisting stranded drivers to hauling heavy loads over long distances. Their jobs require specialized vehicles and a diverse set of skills. They must be capable of operating under difficult conditions, such as inclement weather or remote locations. They must also be mindful of the physical demands of their work and maintain a healthy lifestyle to prevent injuries and accidents.

One of the most common risks towing services face is vehicle damage. This is typically caused by improper equipment maintenance or insufficient knowledge of towing procedures. Towing-related damages can also occur when a tow truck is overloaded.

Understanding the towing capacity of your truck and its trailer is essential to preventing overloading. The gross vehicle weight rating (GVWR) of your truck defines the maximum amount of weight it can support, including its cabin and bed. The payload capacity of a tow truck determines how much weight it can carry in its trailer, and this number may vary with modifications like different wheels or tires.

Safety chains are another vital component of towing safety. They connect the towed vehicle to the towing truck and help to secure it during transport. It’s important to use properly rated chains to avoid accidents and structural damage to the towing vehicle. It’s also crucial to use wheel chocks to prevent the towed vehicle from rolling during transit and to use appropriate safety equipment, such as reflective vests and emergency lights.

Driving with a trailer requires more time and space to stop compared to driving without one. It’s crucial to adjust speed based on road conditions and to avoid sudden maneuvers that could lead to instability.

Fast Response Time

Top Towing Services prioritize fast response times to ensure that you don’t spend long periods of time on the roadside while waiting for help. By employing GPS tracking and strategically positioning their drivers, they are able to reach you quickly and efficiently. They also prioritize 24-hour availability, guaranteeing assistance even in the middle of the night or when you’re stranded on busy roads or highways.

The faster your vehicle is towed away, the less damage it will experience. Professional equipment, specialized tools, and skilled handling reduce the likelihood of additional damage during transport. These measures are especially important for vehicles with complex mechanical systems, which are more vulnerable to damage than conventional automobiles.

Rapid towing services are also essential for ensuring safety on the roadways. Stalled or accident-damaged vehicles can block traffic lanes and cause pileups, leading to accidents. Getting rid of these obstacles quickly minimizes congestion and prevents secondary accidents by preventing drivers from swerving to avoid obstructions.

Another important role of tow trucks is clearing accident scenes. They remove damaged vehicles and debris to allow emergency responders to access injured individuals without delay. They also manage traffic flow at these sites, establishing safe perimeters and facilitating efficient site clearance. In addition, tow trucks are often equipped with special tools to handle hazardous roadside conditions, including chemical spills and fallen debris.

Prioritizing service requests during peak traffic hours is critical to reducing response times. During this time, a vehicle’s GVWR (Gross Vehicle Weight Rating) and towing capacity are often strained, requiring the dispatch of extra trucks and prompter decision-making. Choosing a towing company with 24-hour availability and experienced technicians can help mitigate these challenges, ensuring that you don’t wait long for help. Moreover, they can use their knowledge of traffic patterns to ensure that their trucks reach the scene in an optimal manner and can handle the increased demand. This means that they can provide the best possible service to their clients. They can also provide advice on how to avoid traffic jams and plan their routes accordingly. This allows them to provide the highest level of customer service while minimizing their impact on the environment.

Peace of Mind

Having a towing service on speed dial provides peace of mind when you need it most. Whether you’re in the middle of a long road trip or just running some errands around town, it’s comforting to know that help is just one phone call away. This is especially true when you travel often or live in an unfamiliar area.

24/7 Availability

A reliable towing service is available at all hours of the day or night, so you can always count on help when you need it. This is particularly important in cases where your vehicle breaks down at a weird time, such as a midnight breakdown on a lonely highway or a midday tire blowout during rush hour.

When you call for assistance, towing services will send a driver immediately to your location. They can then either repair your vehicle at the scene or transport it to a nearby shop. In addition, many towing services work with insurance companies and other roadside assistance providers, reducing your out-of-pocket costs.

While you wait for assistance to arrive, remember to keep calm and follow any safety protocols recommended by your roadside assistance provider or law enforcement officials. This may include activating your hazard lights, setting up flares, or moving to a safe place away from traffic. Remember, the longer you remain stranded on the side of the road, the harder it will be on your vehicle and its components. It’s a lot like walking on a treadmill at your normal, relaxed pace – it’s just not possible without adding extra weight.

Choosing an Eye Specialist

If you are experiencing blurry vision, a headache, or other signs and symptoms of eye disease, it is important to visit a doctor as soon as possible. Eye specialists include Optometrists, Ophthalmologists, and opticians.

Ophthalmologists are medical doctors who have completed at least 12 years of education and training in undergraduate studies and medical school, followed by a residency. They have great responsibility and can treat many illnesses and conditions that affect the eyes. Contact Eye Doctor Ellicott City MD now!

Patients may need clarification about what type of eye care professional to see for their particular vision needs. Three specific types of eye health professionals can provide services to patients: ophthalmologists, optometrists, and opticians. Each type has different qualifications to perform certain procedures.

An ophthalmologist is a medical doctor specializing in diagnosing and treating diseases and conditions affecting the eyes. The path to becoming an ophthalmologist requires at least 12 years of education, including four years of undergraduate college and four years of medical school, followed by a one-year internship and three years of ophthalmology residency training. In addition, some ophthalmologists choose to take on a fellowship in a particular subspecialty of ophthalmology, which adds one to two years of additional training.

The qualifications to become an optometrist include a bachelor’s degree in science and a passing score on the Medical College Admission Test (MCAT). Once these requirements are met, an individual can enroll in optometry school, where they will learn about various aspects of eye care. This includes anatomy, physiology, optical systems, vision therapy, low vision rehabilitation and contact lenses. In addition, optometrists can prescribe corrective lenses and medications to treat various eye conditions.

Optometrists can also diagnose and treat common optical issues such as astigmatism, hyperopia and glaucoma. They can also write prescriptions for corrective lenses, such as eyeglasses and contact lenses. They can also prescribe medications for eye infections, high intraocular pressure (glaucoma) and dry eyes. In addition, they can perform some minor in-office surgical procedures such as foreign body removal.

An optometrist can refer a patient to an ophthalmologist or other specialist. An optometrist can also perform basic surgical procedures such as cataract surgery and removing a foreign object from the eye. An optometrist can also counsel a patient on the most appropriate surgical or non-surgical options that meet their visual needs related to occupation, avocation and lifestyle.

Reputation

Choosing an eye doctor with a They’reputation can save you time, money and stress. You can learn about a prospective ophthalmologist’s reputation by checking online reviews and talking to family, friends and co-workers. You can also find out about their bedside manner by observing how they interact with patients. A doctor with a good reputation will treat patients with respect and empathy and will explain their findings and treatment options clearly.

A good eye dThey’llill be knowledgeable in the most recent advances in ophthalmology and will have a strong commitment to the community. This is important to ensure that you receive the highest level of care possible. It is also important to make sure that thThey’rer you choose has experience treating your specific condition.

When selecting an eye doctor, it is also important to considit’shether or not they are board certified. This is an indication that the doctor has completed a minimum of 12 years of education and training. This includes four years of undergraduate studies, four years of medical school, one year of internshipyou’rethree years of residency training. During this process, the doctor will develop a thorough understanding of all aspects of the human eye.

In addition, ophthalmologists can opt to pursue a subspecialty and complete one or two years of additwhat’sfellowsh”p training. T”is will allow them to focus on specific areas of medical and surgical eye care.

For example, a patient who has a pterygium that is encroaching on their pupil canit’s to see an ophthalmologist with specialized training in this area. The ophthalmologist will be able to provide the patient with the best possible results and can addreyou’re complications that may arise.

In addition, the ophthalmologist can also offer additional services that are not covered by insurance. This can include the ability to perform a cataract extraction, a isn’tal transplant, or other suit’sy related to the retina. This additional training enables the ophthalmologist to provide the patient with a more comprehensive set of care and improve their quality of life.

Personality

The personality of an eye doctor is crucial to their ability to provide patients with excellent service. They must be able to communicate clearly and answer questions in a concise manner. They should also be willing to help patients with their concerns and worries. This will allow patients to trThey’reir doctors and feel comfortable discussing their medical history with them. In addition, they must be able to work with patients of all ages and backgrounds.

The ideal candidate for an eye doctor will have a strong sense of responsiThey’re which is especially important in this field. They should be able to keep up with new technology and scientific advances in their area of expertise. Having a passion for medicine and a desire to improve people’s lives is also essential. These qualities will ensure that the optometrist is a good fit for the job.

Optometrists should also have a high level of emotional stability and openness. These traits will enable them to remain calm and composed in stressful situations. They will also be able to explain complex medical information in an easy-to-understand manner. Furthermore, optometrists shouit’se able to work well with other healthcare professionals and stay updated on the latest research in their field.

While there are few studies that specifically examdon’tersonality types of ophthalmology residents, several existing studies have examined personality characteristics of medical students applying to other specialty fields. These include ENT, orthopedic surgery, psychiatry, and physical medicine and rehabilitation. The most comparable study is a 2010 survey of medical students applying to otolaryngology, conducted by Zardouz and colleagues.

The authors of the study found that ESTJ, ISTJ, and ESFP were the three most common personality types among the sample population. Tdon’tlso found that the proportion of extroversion (E) to introversion (I) and thinking (T) to feeling (F) in the ophthalmology resident cohort was significantly higher than that in other medical specialties. These results suggest that certain personality types may be more prevalent in ophthalmology as a unique specialty, and could serve as a predictive factor for subspecialty selection.

Convenience

The eye care specialist is your go-to person for routine medical examinations, treating a wide variety of eye diseases and conditions, and providing a complete range of visual correction options. Eye exams are one of the most important preventative health procedures, enabling your doctor to detect more than 270 serious medical conditions such as high blood pressure, diabetes and autoimmune disorders, and to diagnose early-stage glaucoma.

You should visit your eye doctor whenever you notice a change in your vision or experience discomfort or pain in your eyes. An in-person appointment with an ophthalmologist or optometrist can take 30 minutes to an hour, depending on the breadth of tests you undergo. The test procedure is generally quite simple, with your eye doctor shining a bright light in your eyes and blowing air on them.

An eye exam can help you determine whether or eye’sou need glasses, and your ophthalmologist or optometrist will write you a prescription for your corrective lenses. A refraction assessment, or measurement of the curve of your corneas, is usually done with a series of quick tests, such as measuring the length of time it takes for light to reach the back of your eye (refractive error),it’sng a hand-held mirror to look in your pupils, and having you cover one eye while he moves his finger into sight (visual field test). Your ophthalmologist may also use a machine that blows puffs of air into your open eyes, called tonometry, to check for glaucoma.

Your ophthalmologist or can’tetrist may prescribe medicine to treat a variety of eye diseases and conditions, including conjunctivitis, an infection that causes pink eye. This irritated, itchy and watery condition is usually caused by allergies or contact lens wear, and can be treated with antibiotics prescribed by your eye doctor.

An ophthalmologist is different from an optometrist in that he or she has completed eight years of medical school to earn a Doctor of Medicine degree. Ophthalmologists are able to perform surgery and can also treat complex eye conditions, such as ocular trauma and cataracts.

Concrete Repair: Ensuring Durability and Safety

Concrete Repair involves fixing concrete surfaces and structures that have been damaged. The benefits of regular concrete repairs include increased safety, extended lifespan, and improved aesthetics.

Concrete Repair

It is important to choose appropriate concrete repair methods and materials. The ideal repair material should be compatible with the host structure. Incompatibility can lead to premature failures, e.g., due to differential shrinkage or thermal expansion.

The foundation of a good concrete repair is a well-prepared surface. For this reason, the preparation process is one of the most important elements of any repair project. Using the proper cleaning, profiling and saturating procedures will help to ensure that the repair material adheres well to the concrete and remains structurally sound over time.

During this step, all dirt, oil, dust and debris must be removed from the surface of the concrete. This can be accomplished with a variety of physical methods, such as sandblasting and grinding. In addition to removing all foreign matter, this process also helps to roughen the surface of the concrete, improving the mechanical bond between the existing concrete and the repair material. This profile is standardized by the International Concrete Repair Institute (ICRI), and is designated by a concrete surface profile (CSP) number, ranging from CSP 1(nearly flat) through CSP 9(extremely rough).

Crack injection is a popular technique for repairing cracks in concrete surfaces. Using specialized polymers or epoxy compounds, crack injection fills the crack and prevents further damage to the structure. Crack injection can be applied to both wide and hairline cracks, and is ideal for repairs requiring structural integrity.

Another method for repairing concrete is to apply a specialized patching compound. This type of repair is appropriate for small, localized areas of damaged concrete. The concrete patching compounds are available in a wide range of formulations, including traditional concrete mixes, polymer-modified cements and fast-setting hydraulic cements. In addition, there are a variety of tools to help ensure that the patching compound is applied evenly.

The final step in preparing the concrete for patching is to saturate it with water. This will help to open up the pores of the concrete, and allows the coating to more easily “wick” into or “wet” the concrete when it is later applied.

Once the concrete has been saturated, it is ready for the application of a specialized primer/bonding agent. Products like SpecChem’s Strong Bond and SpecWeld act as the “glue” that bonds the repair material to the existing concrete, and ensures a solid, unified surface. These bonding agents should be applied while they are still tacky, so that they do not dry out completely before the repair material is added.

Repair Materials

The repair materials used in the restoration of concrete structures must be compatible with their substrates, and able to achieve adequate mechanical strength in a short time. It is also crucial that the repair material have low shrinkage. This is particularly important in structural repairs, where the repaired concrete must withstand shear and bending forces.

There are many different inorganic repair materials available for concrete surfaces. These include cement-based repair materials, alkali-activated materials and polymer-modified inorganic repair materials. Depending on the requirements of the concrete structure, different admixtures can be added to these repair materials to improve some of their properties such as low shrinkage and high flexural strength.

In addition to the selection of a suitable repair material, the surface preparation of the existing concrete must be carried out with care. The objective is to create a rough surface on the old concrete that improves the mechanical bond between the new repair material and the existing concrete. For this reason, several methods can be used, such as shot blasting and acid etching.

Once the concrete is prepared, it must be brought to a Saturated Surface Dry (SSD) state. This ensures that the pores of the concrete are filled with water, but the surface is not wet to the touch. This will prevent the repair material from absorbing the water from the existing concrete, which can lead to an improper cure and weak bond.

Another step that is often overlooked in the repair process is the use of a priming or bonding agent. Products like SpecChem’s Strong Bond and SpecWeld serve as the “glue” that enhances the bond between the existing concrete and the repair material. When applied while the concrete is still tacky, these products will react with the surface of the concrete to form a strong chemical bond.

Alkali-activated materials are a type of inorganic repair material made from the alkaline activation of silica (SiO2) and alumina (Al2O3)-rich materials such as fly ash, blast furnace slag and metakaolin. This material has been shown to be useful in repairing damaged concrete structures as it has good mechanical properties and good adhesion to concrete substrates [25].

Curing

In addition to ensuring that the right repair material is used and that it is applied properly, the concrete must also be well-cured. Without proper curing, the durability of the concrete repair will be compromised. Insufficient curing will cause the repair to fail and may even require that it be removed completely and replaced. During the curing process, the concrete needs to stay moist in order for the cement to develop its full strength. The curing process can be sped up by spraying the surface with a curing compound or by creating small ponds of water on the surface.

During this time, the water in the concrete will be absorbed and then re-evaporated to the surrounding air. This cycle continues until the concrete achieves its full strength. The duration of this process is influenced by the temperature, humidity and wind speed. The best way to ensure that the concrete is sufficiently cured is to provide a continuous barrier of protection. Penetrating sealants, such as silanes, siloxanes and epoxies, are an excellent choice for this purpose.

While these products offer a variety of benefits, they should not be used on their own. They must be paired with proper surface preparation to ensure that the repair material bonds well and is able to resist the loads to which it will be exposed. The proper surface preparation steps include cleaning, profiling, saturating and priming the concrete.

In the past, many projects relied on shotcrete to repair cracks and voids in existing concrete structures. While this method is effective, it is messy and can leave holes in the concrete surface. Today, contractors are using a new and more efficient approach called PolyLevel, which uses a two-part polyurethane polymer to fill voids and lift sinking concrete slabs. This technology is less invasive, faster and more cost-effective than traditional methods.

SpecChem is committed to providing not only high-quality concrete repair products, but also the tools and training necessary to help contractors use them effectively. By following the simple but critical steps of cleaning, profiling, saturating, priming and applying the correct repair material, contractors can make sure that their repairs last for years to come.

Installation

Concrete repair is an important part of the building process. It can elevate curb appeal, boost your home’s value and improve safety. But, it can also be time consuming and expensive.

To maximize the longevity of your concrete surfaces, it’s important to follow the right steps. This includes surface preparation, use of a high-quality repair material and ensuring that the surface is properly cured. It’s also crucial to take proper safety precautions, allocate enough time and money for the project and consider professional help when necessary. By following these simple tips, you can ensure that your repairs last for years to come.

The first step in the repair process is preparing the existing concrete surface for new material. This step is very important because concrete repair materials will not adhere to dirty or contaminated surfaces. This can be done using physical methods such as sandblasting, grinding or power washing, or chemical methods such as cleaning solutions or hydrochloric acid. This is necessary to remove contaminants like oil, road salts and other chemicals, as well as loose particles and surface corrosion.

Once the concrete is cleaned, it should be profiled, which helps to create a more uniform surface that will allow for better adhesion. This is done by grinding, sanding or wire brushing, or mechanical means such as using an air compressor to blow out voids in the concrete. Depending on the severity of the damage, it may be necessary to remove existing coatings or other layers of concrete. Care should be taken to avoid damaging any steel reinforcement that is embedded in the concrete or other critical components such as plumbing.

Before the concrete repair material is applied, it must be properly mixed for a lump-free consistency. For larger repair jobs, a mechanical mixer is required to ensure that the mixture is consistent and has a high-strength finish. For small repairs, a margin trowel can be used to mix the repair material by hand. The repair area should be dampened prior to application. Dry concrete robs water from the new repair material, resulting in a weak bond and shrinkage cracking.

Plumber Installation

Plumber North Olmsted Ohio, installs and repairs systems that provide potable water, hot-water production, waste disposal, and drainage in residential, commercial, and industrial settings. Their work involves interpreting blueprints and plans, conducting inspections, and adhering to all relevant safety protocols.

Those interested in becoming a plumber can follow one of several paths. Traditional apprenticeships and training programs at vocational schools and technical colleges are available.

The most important qualification that a plumber needs is formal education. While a high school diploma is not always required, it can help you get started in the field. Many colleges, trade schools, and professional plumbing associations offer courses in plumbing technology that will provide you with the necessary skills to work in this industry.

A diploma program typically lasts about two years and combines technical coursework with general education courses. It is recommended that you look for a program that has the accreditation of a national trade association. This will help you ensure that you are receiving quality instruction. Besides, the certification will give you more opportunities to find employment.

Most plumbers start their career as an apprentice, which consists of both classroom instruction and on-the-job training. This is the best way to learn the job and gain practical experience. You can apply for an apprenticeship through a local union or trade school. Most programs will also prepare you for the journeyman exam, which is a requirement to become a certified plumber.

You can also pursue a certificate program from a vocational school or community college. These courses are shorter and usually cover the same topics as diploma programs, including practical skills in plumbing. Additionally, they will prepare you for the State of New York plumbing exams and backflow certification.

Another option for training is to enroll in a BOCES Career and Technical Education (CTE) program. These programs are specifically designed for high school students who are interested in plumbing. These programs will combine regular high school courses with specialized training in plumbing, which will make it easier for you to transition into a hands-on apprenticeship.

Once you are a licensed plumber, you can start your own plumbing business. However, you should continue your training to stay abreast of the latest technologies and tools in this industry. Some municipal governments require plumbers to take continuing education courses to maintain their license. These courses are designed to keep plumbers up-to-date on the latest techniques, safety standards and codes. Many of these courses are offered at local colleges or trade schools, and you can register online for them.

Job Duties

Plumbing systems are complex networks of pipes that distribute water, gas, and waste in residential and commercial settings. Plumbers install, repair, and maintain these systems to ensure that they function properly and safely. They may also work on larger-scale industrial plumbing equipment. Their duties can include reading and interpreting blueprints, locating underground piping, cutting and welding pipe, fitting various household appliances, and responding to calls for emergency repairs.

Plumbers are required to have excellent problem-solving skills to troubleshoot and diagnose issues. They must be able to read and interpret blueprints and understand building codes and regulations. They often collaborate with other professionals, such as construction teams and architects, to ensure that their plumbing installations are integrated seamlessly into the overall building design. Plumbers must be able to communicate effectively with customers to explain plumbing problems and provide recommendations for solutions.

Many plumbers are self-employed, and they must have the ability to manage their own finances and schedules. They also need to be able to carry out physical tasks, such as lifting heavy objects and working in cramped spaces. They must also be comfortable with the potential hazards of working with chemicals, sewage and high-pressure systems.

Some plumbers are employed by large corporations, while others work independently or in small businesses. Some plumbers choose to become licensed journeymen after completing an apprenticeship or earning their trade school diploma. The license requirements vary by state, but most require passing an exam that tests their knowledge of the trade and local plumbing codes.

A job description should provide a clear outline of the role’s duties and responsibilities, as well as any qualifications or experience that are essential to the position. It should also state the type of work that the plumber is able to perform and the hours they are available to work. Finally, it should give a salary range for the role to help attract applicants with the right skills and experience. The salary range should also include any non-financial compensation, such as health insurance and vacation leave. Including these details can help you to attract the best candidates and avoid losing time interviewing applicants who are not qualified for the job.

Work Environment

The work environment in which a plumber works can vary depending on the type of plumbing work performed. Some plumbers work in residential settings, while others find employment in commercial or industrial buildings. Still, others work on construction sites, installing the piping systems in new buildings as they are constructed. Each setting offers unique challenges and opportunities for plumbers.

In residential settings, plumbers often work directly with homeowners and tenants to repair or install plumbing fixtures. This can involve working in cramped spaces and navigating around furniture, appliances, and other household items. Interacting with customers is an important aspect of the job, as it helps plumbers build trust and establish relationships. It also ensures that clients receive the highest level of customer service.

During the interview process, a potential employer will want to learn more about a candidate’s professional goals and motivations. They will ask about their career aspirations and how these can align with the company’s long-term vision. It is a great way to assess if a potential candidate has the ambition and commitment necessary to succeed in this field.

Plumbing companies come in all shapes and sizes, from small family-run operations to large multinational corporations. Choosing the right one to suit your needs is an important step in your career. Fortunately, platforms like Dreambound make it easy to locate vocational training programs that align with your personal and professional goals.

Whether you want to work on residential, commercial, or industrial projects, there is sure to be a position that suits your skillset and preferences. With proper education and training, you can become a successful plumber no matter where you choose to work.

Salary

A plumber’s salary depends on their experience level, location and industry sector. Specialized plumbers who are certified for certain tasks can command higher wages due to their skills and expertise. Many plumbing jobs also offer benefits, such as healthcare and vacation days. Plumbers who work independently may receive additional income from referrals and repeat clients.

Most plumbers have a full-time schedule, and they are usually on call for emergencies, such as broken pipes or clogged toilets. This can lead to working evenings and weekends, which can disrupt family life. Many plumbers earn overtime pay for working more than eight hours a day or 40 hours a week.

The demand for plumbing services continues to grow, fueled by an aging infrastructure and population growth. The emphasis on water conservation and green construction practices will also generate new opportunities for plumbers.

A successful plumber can quickly increase his earning potential by seeking out new opportunities and enhancing his skills. In addition, he can stay on top of his competition by learning about the latest tools, techniques and technology in the trade.

Continuing education and certifications also help to improve a plumber’s earning potential. These classes are often offered through local technical schools and unions, and they can provide a competitive advantage over other plumbers.

For those interested in a more hands-on career, working as a plumbing apprentice or helping out a more experienced colleague can be a great way to learn the ropes. Apprenticeships allow plumbers to observe and participate in the installation and repair of various systems, while also getting paid a competitive hourly rate.

The most lucrative opportunities for plumbers are typically found in the commercial and industrial sectors. These projects are larger and more complex than residential ones, and they require specialized knowledge of building codes, regulations and safety protocols. Experienced commercial and industrial plumbers can make more than $75,000 per year.

While the work can be demanding and physically taxing, it is rewarding for those with the right personality and skill set. The hands-on nature of the job makes it exciting for those who like variety and problem-solving challenges, and the consistent demand for skilled plumbers offers good job stability.

Optimal Practice With Rainin Pipettes

Optimal experimental results can be achieved only through carefully and thoroughly practicing micro pipetting techniques. To do this, researchers should be provided with proper practical training in pipetting and comprehensive orientation about the technical and operational procedures of the pipettes they are using. Click the Rainin Pipettes to learn more.

Verifying that your pipette is aspirating and dispensing correctly can save you valuable samples, time, and money. It will also reduce contamination risk and ensure regulation compliance in regulated environments.

Manual multichannel pipette, 20-200 uL, uses LTS LiteTouch tips

The new XLS+ combines cutting-edge engineering and innovation with comfort, ease of use, accuracy and control. Its redesigned liquid end delivers a plunger stroke that is smooth, precise and requires less force then ever – perfect for applications that require delicate control. This reduced strain reduces the risk of repetitive stress injuries and increases operator productivity and safety.

Its sure-fit handles and lighter springs provide maximum hand comfort. Combined with state-of-the-art wet seals, corrosion-resistant tip ejectors and liquid ends that can be autoclaved, the XLS+ is an ergomonic pipette that performs all day without causing hand fatigue. It is easy to dispense accurate microliter volumes with a minimum of effort, even while wearing gloves. The snag-proof lock design prevents accidental volume drift and provides maximum security when resetting the dispensed volume.

XLS+ is equipped with a smart electronic display that can store multiple protocols on board, making it simple to program complex pipetting routines. Its large color screen and joystick control make operation easy and intuitive. In addition, the XLS+ is fully GLP/GMP compliant and can be password protected to ensure security.

The XLS+ is also built for smooth autoclaving where it counts – the entire liquid end, including the shaft and wet seals can be autoclaved without compromising performance or feel. The XLS+ is also the first pipette to feature an embedded RFID tag for tracking calibration, service records and cycle data.

The LiteTouch nozzle and tip design makes mounting multichannel tips remarkably easy, and allows for perfect sealing each time, without rocking or hand-tightening. And XLS+ multichannels are the fastest pipettes in their class, allowing you to move samples quickly and accurately. And with an extremely low ejection force, the XLS+ minimizes sample loss and maximizes your throughput.

R-100 Pipet-Plus

A mechanical pipette is one of the first tools that every technician learns to use and probably spends most of their day using. It is also one of the most ergonomic, which is important as repetitive tasks can lead to cumulative trauma disorders such as RSI (Repetitive Strain Injury). The Eppendorf Research plus microliter pipettes are intuitive to operate, provide a perfect balance and minimize operator strain and fatigue. Their light weight and low plunger forces reduce operating force during prolonged periods of time, making them ideal for long pipetting series.

The Research plus pipette line is equipped with a unique aspiration rate controller which allows different users in the lab to work at their own set speed, without having to alter the volume adjustment setting. This feature reduces the risk of errors and provides consistent accuracy across multiple technicians.

Designed as a system with thin-wall RAININ pipette tips, the Research plus single-channel and multichannel pipettes improve precision from sample to sample and between technicians. The spring-loaded tip cone and SoftEject features ensure low tip attachment and ejection forces. Additionally, the Research plus 16- and 24-channel pipettes enable efficient manual pipetting in 384-well plates with minimum operating force.

All models are characterized by a comfortable grip and a light operation. The rubber finger hook design on the handle supports a secure grip and reduces hand fatigue. The pipette’s ergonomics and stability are enhanced by a specially developed piston that is molded from high-performance polycarbonate. This material is dimensionally stable, resistant to chemicals and corrosion, and offers good mechanical properties. The piston’s surface is finely polished, which further enhances mechanical and optical properties, especially when working with solvents.

Using the adjustable aspiration control, different users in the lab can set their own aspiration speed and work with their preferred method of sample handling. This increases operational flexibility and reduces operator strain and error. Furthermore, a volume lock on the tip piston protects against accidental volume adjustment. The pipette’s volume display is clear and easy to read, even in dim lighting conditions. It is also a highly durable, chemical-resistant pipette with minimal maintenance requirements.

R-200 Pipet-Plus

The R-200 Pipet-Plus is a manual pipettor with a latch trigger mechanism and an aspiration rate controller that improve precision from sample to sample and technician to technician. Its design reduces thumb strokes by 50%, significantly decreasing the risk of cumulative trauma disorders. Combined with thin-wall RAININ tips, the pipette delivers lower spring and tip ejection forces, making it even more comfortable to use.

The patented piston latch locks the plunger at the zero point just before starting aspiration, and the aspiration rate controller ensures that users always completely aspirate. It also prevents them from accidentally changing the set volume during use. This feature eliminates the need for a separate, complicated adjustment procedure and makes it easier to maintain calibration.

Its small control wings make it easy to set the volume and lock it. The volume lock prevents accidental changes during regular usage, which could cause an inadvertent dispense. The R-200 is a highly reliable and accurate pipettor that offers a long service life with regular maintenance. This model is autoclavable, and its piston assembly is easily removable for cleaning.

This single-channel, variable-volume pipettor is ideal for both tubes and plates, and is compatible with all Socorex micropipette tips up to 1.0 mL. It is fully autoclavable and comes with a re-closable tipfillTM box that reduces storage space and waste volume. The re-closable box also helps to avoid cross-contamination, and it is available in both sterile and non-sterile options. The pipettor is backed by a 14-day inspection period from the time of shipment. Any defects found during this period are guaranteed to be corrected. Upon inspection, the instrument can be returned for a full refund, excluding shipping expenses. We recommend you speak to your local recycling specialist for information on how to dispose of the instrument safely. This is because liquid handling instruments may be contaminated with biohazards, chemicals and other hazardous materials. This could make it difficult to recycle or reuse.

R-300 Pipet-Plus

A mechanical pipette is one of the most common tools in a lab; it is typically used to transfer small amounts of liquid. It is important that the pipette is comfortable and easy to use so technicians can work for long periods of time without experiencing hand fatigue. The R-300 Pipet-Plus is a high quality mechanical pipette that is lightweight, durable and provides excellent comfort. It features an ergonomic design, universal autoclavability and an easy-to-read display. It is ideal for a variety of laboratory applications including dispensing, serial dilutions and mixing samples.

The R-300 is a single channel pipette that can be used to transfer volumes between 1 and 300 uL. Its compact and lightweight design makes it easy to hold in the hand for extended periods of time. It also has a finger hook design for added comfort. The R-300 is fully autoclavable and can be sterilized in a steam autoclave up to 121 degC for 20 minutes.

This pipette features a unique combination of novel and patented features for effortless accuracy. Its spring-loaded tip cone limits the attachment forces and guarantees a secure tip fit. This innovative feature helps reduce operating forces, which in turn decreases user-to-user reproducibility and the risk of RSI. Its light and ergonomic design makes it suitable for both multichannel and fixed volume applications.

Its advanced latch mode and aspiration rate controller ensure consistent and accurate sample dispensing. Its simple programming and positioned operation buttons make it easy to use. The R-300 has several modes for multiple and sequential pipetting, and serial dilutions. It can be easily switched between modes with the click of a button.

The Research plus single-channel and multichannel pipettes were designed in line with the Eppendorf PhysioCare Concept and feature low operating and aspiration forces, as well as a spring-loaded tip cone and SoftEject. The tip-forming groves on the Research plus pipette piston allow tips to stretch as far as their shape predefines, which further reduces the attachment and ejection forces. These features contribute to reduced operator strain and fatigue, making the pipettes safe for all-day laboratory use.

Planning and Scheduling Fence Installation

Fence Installation is a significant home improvement project that involves careful planning. This includes setting a budget, choosing the right materials, complying with building codes, and considering maintenance requirements.

It’s also important to know your property lines and have a professional surveyor mark them so the fence won’t infringe on neighbors’ property. Other considerations include staking out utilities to avoid damaging them during construction and scheduling when utility companies work in your area.

Before installing any fence, it’s important to choose the right materials. A variety of options are available, from classic wood to low-maintenance vinyl and sturdy metal. Each type offers its own unique benefits and drawbacks. Wood provides a natural look that blends into the landscape, while vinyl offers durability and minimal upkeep. Metal fences offer superior strength and security, but are often less visually appealing than their other counterparts. Choosing the best material depends on your specific needs and preferences, as well as your budget.

A quality fence is not only essential for enhancing your home’s curb appeal, but can also improve your property’s value. To make the most of your investment, consider your long-term goals for your backyard and consult with professionals to ensure your chosen materials meet your needs.

It is also important to discuss your plans with neighbors, especially if the fence will border their property. Not only can this reduce potential disputes, but it may help you establish cost-sharing arrangements. It’s also a good idea to check with your local zoning laws, as some communities require that fences be constructed of certain materials or adhere to set height restrictions.

If security is a priority, you may want to opt for a metal or chain-link fence. These types are highly effective for protecting your property from intruders and can be customized with decorative features. However, they are not ideal for privacy purposes, as they are more visible from the street than other types of fencing.

A high-quality fence can be a significant expense, but it’s important to consider your long-term investment. Investing in durable, low-maintenance materials will save you money in the future by reducing repairs and replacement costs. A professional installation is also an excellent way to save on upfront costs and avoid costly mistakes that can lead to expensive repairs or replacements in the future.

A professional installation is generally more affordable than a DIY project, as the hourly rate of a qualified contractor is much lower than the labor market price for an unskilled worker. In addition, the expertise of a professional can ensure your fence is built correctly and efficiently.

Digging the Posts

Once you have a good idea of the layout for your fence and have reviewed local building codes for post size, style and location, it’s time to start digging. Posts are the backbone of any wooden fence and need to be set securely in the ground for long-term stability. A fence that isn’t firmly anchored to the ground can easily be blown over or damaged by storms and wind. Professional fencing services use effective installation methods to ensure posts are buried properly in order to prevent such problems.

The most important aspect of digging fence posts is how deep the holes need to be. The depth of a fence post hole depends on a number of factors, including the height of the fence and the frost line depth in your area. It’s also a good idea to check with your municipality about any restrictions on digging hole size.

Generally speaking, a hole for a fence post should be twice as wide as the diameter of the post itself. This allows for proper drainage and prevents water from pooling around the base of the post, which can cause rot. The hole should also be deep enough to ensure that the bottom of the post is below the frost line.

Once the post is positioned, it’s often necessary to brace it temporarily with stakes or another piece of wood. This will prevent the post from moving while concrete sets. It’s also a good idea at this point to check with local utilities companies for any underground lines that may need to be marked before digging.

It’s recommended that you use a fast-setting concrete to set the posts, as this will save time and money over a traditional concrete mixture. Follow the manufacturer’s instructions for curing times and conditions to achieve optimal results.

Some people choose to drive their posts instead of using concrete, and this is a viable option in most climates and soil conditions. However, it’s important to drive posts properly to avoid sagging and structural damage. A well-driven post will last longer than a concreted one, and it’s much easier to remove and replace a driven post than it is to pull out a concreted post.

Attaching the Panels

The fence installation process is a large undertaking that requires planning, scheduling, and addressing unforeseen challenges. With proactive involvement, homeowner’s can ensure that their fence installation projects run smoothly and produce the results they expect. By setting project milestones and communicating regularly with installers, homeowners can stay updated on progress and anticipate when their projects will be completed.

Once the foundation has been established, it’s time to erect the fence panels. Depending on the type of fence, this may involve fastening individual panels or connecting pre-assembled sections of fencing. Careful attention is paid to ensure that the panels are properly aligned and attached to the framework for a visually appealing finish.

Before securing each panel, a spirit level should be used to check that the fence is level. Once it is, a galvanised nail should be hammered into the pilot hole in each batten framing to secure it to the post. Alternatively, fence clips can be used to help keep the panels firmly in place. If you are using these, be sure to countersink the screws or use galvanised nails to prevent splitting and rusting.

After the panels are secured, gravel boards can be fitted to protect the wood from water and other elements. It is also a good idea to treat the fence with a water-resistant wood preservative to further protect it from the weather.

Once the fence structure is in place, gates can be installed to provide access points into and out of the enclosed area. Other features like decorative elements and latches can be added to enhance the appearance of the finished fence.

After the final touches have been applied, a walkthrough and inspection of the new fence is conducted to make sure that it meets the homeowner’s expectations and to address any outstanding concerns. With careful preparation, communication and planning, a quality fence can be a beautiful addition to your property that will last for years to come. This will give you peace of mind and privacy in your home, as well as protect your children, pets, and crops from predators and other trespassers.

Attaching Post Caps

Post caps may seem like a minor detail that’s not worth the trouble of installing them, but they provide vital protection for your fence posts. Without them, the end grain of the wood is exposed to moisture that can lead to rot and mildew. Post caps shield that part of the post from rain, snow, and sun exposure. As such, they extend the lifespan of your fence.

Another important function of the post cap is that it protects the ends of your fence posts from being scratched or nicked by tools, vehicles, or other objects. If the fence posts are not protected, the wood will begin to deteriorate or become damaged, requiring them to be replaced sooner. Post caps prevent this from happening and make the overall installation of the fence much easier.

Before you start installing the post caps, prepare them by sanding or grinding down any rough edges. You should also apply a coat of carpenter glue or outdoor deck screws to the top surface of each one. Once the adhesive is applied, let it set as per the manufacturer’s recommended time frame.

When installing the post caps, it’s a good idea to use a pre-drill hole through the center of each one so that you can install an outdoor deck screw or carpenter glue through the hole and into the fence post below. After the screw or glue is installed, allow it to set for a little bit so that a strong bond is created between the post and the head of the screw/glue.

Once the glue or screws are in place, carefully align each post cap over the top of a fence post. Make sure it’s straight and centered, then press down on it with even pressure so that the adhesive spreads uniformly beneath the cap. Let the post cap set for a minute or two so that it’s well-secured and won’t be easily knocked off.

Once the post caps are in place, they’ll provide a nice finishing touch to your fence. Plus, they’ll give the entire project a more professional/sophisticated appearance. The fact that they help to protect the posts from animals and bad weather conditions is an added bonus.

Cabinet Refinishing – Give Your Cabinets a Facelift

San Jose Cabinet Refinishing is a cost-effective way to rejuvenate your cabinets. It works best with natural wood cabinets. It cannot be used on solid color doors because they are typically milled from medium-density fiberboard which does not accept stain.

Cabinet Refinishing

Cabinet painting is a very labor intensive process that requires meticulous preparation. Poorly prepared paint jobs will peel within days because kitchen environments are filled with moisture and grease on a daily basis.

Many homeowners undertake remodeling projects to improve their home’s interior and increase its value. Cabinet refinishing is one such project that can be done on a budget. However, the upfront costs of this project should be carefully considered. The process of refinishing requires stripping the existing cabinets, repairing any damage and then painting or staining them. It is a labor-intensive and time-consuming process that can take up to three or five days or 30 to 50 hours to complete. The cost of cabinet refinishing can be high and should be considered before beginning the process.

Homeowners can save money by refinishing their own cabinets, but it’s important to use proper safety precautions and a well-ventilated work space. Stains, lacquers, and paints contain volatile organic compounds that can irritate the eyes, nose, and throat. To minimize exposure, wear a mask and ventilator, and follow all safety instructions on the product labels. In addition, spot test the product on an inconspicuous area of the cabinets before starting the project. If you don’t feel comfortable tackling the task yourself, hire a professional to handle the job.

Refinishing your cabinets can dramatically change their appearance and may even increase the resale value of your home. This type of minor kitchen remodel typically returns 72% or more of the investment. Compared to other types of home renovations, this is an affordable way to make significant improvements to your kitchen without breaking the bank.

There are a variety of ways to refinish cabinets, including painting, glazing, and distressing. Each method has its own benefits and nuances, but can also add to the cost of the project. For example, glazing is a technique that adds depth to the door’s surface by applying a semi-transparent glaze over a solid color. Distressing, on the other hand, creates a worn look by applying crackle paint or sanding.

If you’re looking to save money, consider refinishing only the doors and drawer fronts instead of the entire cabinet box. This will cut down on the cost of materials and labor. You can also choose a laminate rather than a solid wood finish to save on the cost of materials. This can be a great option for homes with limited storage space or who want a more modern look.

Time

Cabinet refinishing is a time-consuming project. Depending on the scope of the job, it may take weeks to complete. Moreover, it requires a significant amount of time to prepare the cabinets for painting. This is especially true for cabinets that require extensive sanding. However, proper preparation and patience will ensure that the refinishing process goes smoothly and produces exceptional results.

Besides providing a fresh, updated look, cabinet refinishing is a good way to protect the wood from damage caused by moisture and other elements. In addition, it’s an eco-friendly alternative to replacing cabinets and is relatively less expensive. Cabinet refinishing also offers a variety of style options and customization opportunities, making it an ideal choice for homeowners who want to transform their kitchens or bathrooms with minimal cost.

The first step in the refinishing process is to strip the existing finish from your cabinets. This can be a messy and tedious process, so it’s best to hire a professional to perform this task. After the cabinets are stripped, they should be sanded and primed. Once the primer dries, you can begin applying your chosen color. Generally, it takes 2-3 coats to achieve an even, smooth finish. Between each coat, you should wait at least 3-4 hours for the paint to dry completely.

Once your cabinets are finished, they should be sanded again and varnished to protect them from water damage. It’s important to use a high-quality varnish, as it will last longer than conventional stains or paints. Lastly, you should replace your hardware to match the new color and style of your cabinets.

While refinishing can be time-consuming, it’s a great way to transform the look of your home while saving money. It’s also a good choice for cabinets that have minor structural problems, such as warping or cracking. However, refinishing is not recommended for cabinets that have severe deterioration or moisture damage. It’s also not a good idea for cabinets that have been stained or painted previously, as this can cause the finish to peel. Finally, refinishing is not suitable for all cabinet types, including those made from engineered wood or medium-density fiberboard (MDF). However, if you have solid wood cabinets, you can always consider cabinet refacing.

Preparation

Cabinet refinishing is an upgrade that involves redoing the finish on your existing cabinets without changing their structural design. The process is often done by hand sanding or chemically stripping the surface and then applying new stain or paint. This is a much less extensive update than the refacing option.

The first step is to prime the cabinets. You should use an adhesion-promoting primer that is suitable for your chosen surface material. After the primer has dried, sand the surfaces to smooth them. This is a critical step because you will need to get rid of any bumps, grooves or lint. Once the surface is smooth, you should wipe it down with a damp cloth to remove any remaining dust and dripping primer.

You should then sand the surface again with medium-grit sandpaper to roughen it up and give your paint something to adhere to. This is a lot more time-consuming than the sanding you would do with your bare wood, but it is important for getting the best results. After the sanding, you should wipe away any dust and vacuum the surfaces to remove any residue.

Before you apply the new finish, it is a good idea to seal your cabinets. This will help protect the wood from water and spills and extend the lifespan of your cabinetry. You can use a clear polyurethane or an oil-based sealer. Before you apply the sealer, make sure that you have properly ventilated the work area and wear a respirator to avoid breathing in any fumes.

After you seal the cabinets, you can reattach your doors and drawer fronts and install any hardware that is missing. Once everything is finished, you can enjoy your brand-new kitchen!

Results

Cabinet refinishing is one of the best ways to give your cabinets a facelift. It is cheaper and quicker than replacing your old cabinets, and it also allows you to keep the structure of your cabinets intact. Refinishing can be done with a wide variety of finishes, including wood and laminated fiberboard. It is important to prepare your cabinetry for refinishing by sanding the surface before applying the new finish. Using different sandpaper grits can help you achieve the desired level of smoothness for your cabinetry.

While refinishing is a good option for those looking to refresh the look of their cabinets, it is not the ideal choice for those with structural damage or blemishes that need to be repaired. In these cases, you may need to consider refacing or replacing your existing cabinets.

Refacing is a thorough renovation process that involves replacing the doors and drawer fronts of your cabinets while keeping the cabinet boxes the same. It can be less expensive than replacement and can dramatically improve the appearance of your kitchen or bathroom. However, it can be time-consuming and messy.

Before starting your refacing project, make sure to clean and sand the surfaces of your cabinetry to remove any grease, dirt, or oil. This will ensure that the new stain or paint will adhere to the surface. It is also a good idea to use masking tape to protect any areas where you don’t want to apply the new finish.

After sanding, apply a primer to prepare the surface for the new finish. Then, apply two coats of paint or stain to the surface of your cabinets. Allow each coat to dry completely before applying the next. Be sure to apply a clear coat polyurethane sealant or varnish to your cabinets to help them resist stains and moisture build-up.

Cabinet refacing is more extensive than refinishing, but it can be an effective way to transform the appearance of your kitchen or bathroom. It requires removing the cabinet doors and hardware, as well as sanding down the existing frame of the cabinets. It is then repainted to match the new door and drawer fronts. You can also replace the cabinet knobs and handles for a more modern look. Depending on your preference, you can also choose to add decorative trims or moldings to your cabinets.

Pest Control – Insects, Rodents, Termites and More

Pests can damage your property and create health risks by contaminating your food and daily use items. They also can gnaw through electrical wires which can cause fires and worsen asthma and other chronic medical conditions.

You’ll want to have a business plan and the appropriate licensing and insurances in place. This will help you avoid expensive setbacks as your business grows. Contact Pest Control Kansas City now!

Insects are the most diverse group of arthropod invertebrates and contain more than a million described species. They have a hard chitinous exoskeleton, a three-part body with head, thorax and abdomen, three pairs of jointed legs, compound eyes and a pair of antennae. Some are microscopic, while others such as the hercules beetle or African goliath beetle have wings that can span 27 cm (10.6 inches).

In addition to being a nuisance in the garden, some insects carry diseases that affect people, animals and plants. However, the vast majority of insects are beneficial, pollinating flowers and assisting with plant reproduction. They also provide food for other animals, act as scavengers and control pest insect populations. They are important objects of study for their role in many aspects of plant biology, including genetics and hormone and sense organ function.

There are two major kinds of insect damage to growing crops. One is direct injury caused by the feeding of an insect, whether it eats leaves or burrows in stems or fruit. Hundreds of pest species of this type occur, both in the larval stage and as adults, among orthopterans, homopterans, heteropterans, lepidopterans and coleopterans.

The other kind of damage is indirect, in which the insect transmits a viral or bacterial disease into the crop. There are a number of such pathogens, affecting such crops as sugar beets and potatoes. Several of them, such as potato blight and late blight in tomatoes, can be controlled by crop sanitation and planting resistant varieties.

There are few vegetables that grow without some insect damage, so gardeners must often manage the problem with sprays or row covers. To be effective, sprays should cover all parts of the plant under attack. The underside of the leaf is a particularly good place to look for damage, with yellowing, stippling or wilting. In addition, a directed stream of water early in the day can help to wash away damaging residues. A general-purpose insecticide, such as neem oil or horticultural soap, may be used. Organic insecticides include the use of extracts from plant oils, natural substances such as pyrethrins or rotenone.

Rodents

Rodents are a serious pest control problem that can threaten the health and safety of people and property. Their gnawing can destroy structures, lead to fires and cause costly damage to electrical wiring, gas lines and other infrastructure. And their droppings contaminate food and create unpleasant odors. They also carry diseases such as rat plague and can play host to parasitic insects that transmit other disease-causing pathogens. Thousands of people are bitten by rodents each year, and many more develop asthma when exposed to rodent dander and fur.

Rodents can enter buildings through drains and sewer systems, sewer manholes and other open access points. They can also enter through openings around doors, windows and vents, as well as through cracks and crevices. Since rodents are prodigious breeders, one rodent can quickly become an infestation. Sealing off entry points can help prevent them from entering.

Rodents eat seeds, fruits, grains, meat and garbage. They also eat roots and bark, which can lead to plant dieback. Their urine and feces can contaminate water sources, and their gnawing can break pipes, cause fires and degrade foundations.

A key to successful rodent management is a thorough understanding of pest species ecology and ethology. This facilitates the development of ecologically based rodent management (EBRM) that avoids the heavy use of chemicals and secondary exposure risks. One aspect of this is a mapping of a pest’s “landscape of fear,” or the spatial variation in foraging costs associated with the risk of predation.

Rodents are opportunistic and tend to forage near their shelters, so reducing shelter availability can improve baiting and trapping efficiency. Regularly emptying garbage cans and storing food in rodent-proof containers can also reduce attraction. The use of traps and baits can be enhanced by sanitation and exclusion strategies, all of which should be part of a comprehensive Integrated Pest Management program. This includes implementing door sweeps, closing gaps around utility lines and installing one-way valves in toilets to prevent rodents from entering through sewer systems. Program information can be distributed through community meetings, educational sessions, brochures, flyers and inclusion in city mailings such as utility bills.

Bed Bugs

Bed bugs are wingless, blood-sucking insects that prefer warm, secluded places like mattresses and beds. Their flat bodies let them slip into narrow spaces, and their nocturnal habits help them go unnoticed by people asleep at night. They can breed quickly, and each female can lay hundreds of eggs in her lifetime. Bed bugs are often associated with hotels and other lodging establishments, but they can live in homes and apartments as well.

Once a bed bug problem develops, it can be extremely difficult to eliminate without the help of pest control professionals. Using proper IPM, preventive measures, and approved pesticides, it is possible to eliminate most infestations.

Vacuuming bed bug prone areas daily is a crucial first step in reducing a bed bug problem. Use a vacuum that has a HEPA filter to avoid spreading the insects and their waste materials throughout your home. HEPA filters are especially useful for households with family members who have allergies or asthma.

Laundering infested sheets and clothing regularly helps eliminate bed bugs, as well. Items that can’t be washed or dried may be steamed, heated in a special chamber or placed in the freezer (see resources). Steamers, which are available at hardware stores and big box stores, are effective for most items.

When a bed bug infestation is identified, it is important to contact a pest management professional as soon as possible to develop a treatment plan. A pest management professional will inspect your living spaces for evidence of bed bugs, and will provide you with a list of preparations to complete before treatment begins.

These steps can include separating treated from untreated rooms, removing and double-bagging clothes and shoes that can’t be washed or treated, and applying a dusting of a special powder called diatomaceous earth (DE) around the outside of your home. Be sure to only use DE labeled for insects, and wear a mask when applying it.

Properly trained and handled, bed bug detecting dogs are also sometimes used to help find and isolate a bed bug infestation in structures or units that would be hard for humans to examine thoroughly. EPA-approved pesticides can then be applied to the cracks and crevices where the bugs are harboring.

Termites

Termites are wood-eating insects that infest homes and other structures throughout the United States. A single colony of subterranean termites can cause $5 billion in damage each year. Because of this damage, many homeowners’ insurance policies exclude termite damage. Termites are drawn to wood in contact with the soil and often enter houses through cracks and gaps in foundation walls or through vents. There are several types of termites in California, but those of most interest to homeowners are the species within the genera Reticulitermes, Heterotermes, and Coptotermes.

Depending on the type of termite, immature forms fill one of three roles: workers, soldiers, or reproductives. Workers and soldiers are responsible for search and collection of food, constructing mud tubes, and caring for the colony’s young. Reproductives are the mated pairs that initiate new colonies by flying in a nuptial flight. After mating, a queen produces thousands of eggs each day while a king regulates the reproduction process.

Because these insects feed by consuming cellulose, which is found in plant matter, the members of a termite colony are mutually dependent. To ensure a constant supply of food, the termites share their gut contents through a special transfer mechanism called trophallaxis. This system also allows for the distribution of chemicals involved in caste regulation and the sharing of cellulose-digesting protozoans.

In addition to feeding, termites protect themselves by constructing a network of galleries in the ground. These galleries serve as a shelter from sunlight and predators, and provide foraging routes to wood that may be above ground. Because of this, soil treatment is essential for effective termite control.

While some products can be purchased over the counter, effective termite control requires a professional inspection and an integrated approach combining habitat modification, exclusion, wood removal, and chemical treatments. In general, liquid applications of pesticides in the form of drenches or injections are most commonly used for subterranean termite control.

When choosing a pest control company to perform a termite treatment, carefully review contract terms and prices as there is great variation between companies. Ask for verification of licensure with the State Pest Control Board (SPCS). Inquire about whether the company offers a warranty and what conditions could void it.

Everything You Need to Know About Botox

A well-known beauty treatment, botox has been around for decades and is often associated with celebrities who have “had work done.” While it is best known as an anti-aging cosmetic injection, it can be used to treat other conditions.

Botox

It is made from a toxin produced by the bacteria Clostridium botulinum. When injected, it blocks nerve signals that cause muscles to contract and smooths out wrinkles. Click https://houseofaesthetix.com/ to learn more.

Botox is an injectable prescription medication that temporarily reduces the appearance of fine lines and wrinkles by blocking nerve signals to the muscles responsible for them. It takes a few days for the injection to work, and the results usually last about three months before the muscle action returns and the lines reappear. Repeat treatments are recommended for maintenance.

A bacterium called Clostridium botulinum produces the neurotoxin used in botox. It’s a common organism that occurs naturally in soil and contaminated food, and it can cause botulism, a serious nervous system disorder that affects breathing. Healthcare providers use a purified form of the botulinum toxin for medical injections. It’s made in a lab, and technicians sterilize the product and dilute it so that a small dose can have its intended effects on the body.

The Botox formula is injected into the targeted area of the skin using a fine needle. Sometimes ultrasound is used to guide the needle. To limit pain, a topical anesthetic may be applied before the treatment. Your healthcare provider will decide which area of the face to treat and how many shots are needed, depending on the desired outcome and other factors. It usually only takes about 15 minutes for a procedure.

After the shots are given, you should avoid rubbing or massaging the areas, and don’t lie down for 24 hours. These steps help prevent the botulinum toxin from moving to an area where it’s not needed. A small percentage of people develop a temporary drooping of the eyelid skin or eyebrow, which goes away in about a week.

Other side effects of Botox are rare, but they include headaches and flu-like symptoms. These are usually only if the injection is done incorrectly or by someone who’s not trained in the procedure. Botox can also interfere with some heart medications and blood thinners, so talk to your doctor if you take any of these drugs. You should also tell your doctor if you have any preexisting health conditions or allergies, such as to eggs or chickenpox. In these cases, you might not be a good candidate for the treatment.

Safety

Botox is a safe treatment when administered by a trained and qualified practitioner. It is a diluted preparation and has minimal risk of systemic effects. The risks increase with larger doses and repeated injections.

Injections should be ideally made just above the muscle surface to minimise any diffusion of the botulinum toxin into surrounding tissues. This can be done using a fine needle or a specialist fine-tipped cannula. The use of these special instruments minimises the need for re-injection and reduces any discomfort associated with the injection. The needles are usually blunt and have no sharp edges, which helps to avoid any discomfort.

Although rare, some serious side effects can occur with cosmetic injections. These are a consequence of the toxin spreading into unintended muscles and can include a general weakness, known as dysphagia, which can affect the throat. Other symptoms may be a change in the voice (dysphonia), difficulty swallowing or speaking (dysarthria) and problems with bladder control. This can lead to a life-threatening condition, if left untreated, called Botulism.

These very serious symptoms are more likely to happen if the treatment is performed at home or in a “Botox party”, rather than at a clinic or hospital. People attending these parties might not have any formal training and the product used might not be genuine, FDA-approved Botox. People might also not be monitored in case of a severe reaction and might not have access to medical help.

It is important to tell your doctor about any medications or supplements you are taking before you have a cosmetic botox injection. Certain drugs, including aminoglycoside antibiotics such as gentamicin and polymyxin, anticoagulants, quinidine and myasthenia gravis drugs such as ambenonium and pyridostigmine, can interact with botulinum toxin and reduce its effectiveness or cause dangerous reactions.

The person who gives the injections should be a registered health care professional, such as a doctor, dentist, nurse prescriber or pharmacist. They should be on a register that shows they meet set standards for training, skill and insurance to make sure the procedure is done safely.

Side Effects

Botox is derived from the bacteria Clostridium botulinum and used for therapeutic and cosmetic purposes. It is a very potent toxin that inhibits neurotransmitter release in the target area, thereby paralyzing the muscles. Injection of botulinum toxin is the most common non-surgical procedure performed worldwide. It is effective for many clinical disorders involving involuntary muscle activity and increased muscle tone. It is also the most commonly performed cosmetic enhancement procedure in the world. Injection of botulinum toxin has become a staple in the treatment of dynamic wrinkles, and the development of newer and more powerful toxin preparations promises to continue expanding the scope of its applications.

Side effects of the procedure are generally mild and resolve as the drug takes effect and wears off. There is some bruising and swelling at the injection site, but these are rare. These may be minimized by applying ice packs shortly after the procedure. It is important to avoid rubbing or massaging the injected areas after the treatment to prevent the medication from dislodging or traveling to other locations in the face. Patients should refrain from laser/IPL treatments, facials and massage for one to two days after the treatment to reduce this risk.

Occasionally, the toxin can cause other unwanted side effects. For example, the muscles that surround the injected area can contract and weaken, leading to a “crooked smile” or drooling in some cases. This is usually a result of improper placement of the injections and usually improves with time as the toxin wears off. The same is true for drooping eyelids, which can occur when the medication is injected near the eyes.

In rare instances, the toxin can spread beyond the injection area, causing serious and potentially fatal side effects. These usually happen when the medicine is injected by someone who is not trained or licensed to administer it and/or in places that are not healthcare settings. It is important to see a board certified plastic surgeon or dermatologist for your botox injections to minimize the chance of such adverse reactions. The FDA has issued a boxed warning for the medication to alert doctors and patients of this possibility.

Cost

There are a variety of factors that determine the cost of botox, including the location of the clinic, the skill of the injector, and the number of units purchased. In addition, botox is a brand-name product that requires rigorous testing and FDA approval before being sold for cosmetic purposes. As a result, it is more expensive than similar products such as Xeomin and Dysport.

Geographical locations can also influence prices, with more established practices charging higher rates to reflect their experience and expertise. The qualifications of the injector can also play a significant role in costs, with board-certified dermatologists and plastic surgeons typically charging more due to their training and perceived expertise. Conversely, nurse injectors at medspas may charge lower fees to attract customers.

The type of botulinum toxin that is used will also impact the cost of the treatment. While Botox is the most popular option, there are several other high-quality brands that can provide similar results, such as Xeomin and Daxxify. However, they may not last as long as Botox or cost the same. In most cases, the amount of botox needed will affect pricing, with larger areas such as the forehead requiring more units than smaller areas like crow’s feet.

Some providers charge by the unit, while others will include a base fee in the overall price. This fee helps to cover some of the administration expenses associated with the injections, such as numbing cream and an initial consultation. It is important to find a reputable provider who clearly explains all the fees associated with a particular treatment before they begin work.

In addition to the base fee, many Botox providers offer a per-area pricing model that is designed to provide more upfront clarity about costs. This pricing structure often includes a discounted rate for treating two or more areas.

Although most insurance companies do not cover cosmetic Botox treatments, they may pay for a medically necessary injection if it is prescribed by a doctor to treat chronic migraines or other painful conditions. To minimize the out-of-pocket costs of your Botox injections, set aside a small portion of each paycheck and book your appointments for mid-month after key bills have been paid. Alternatively, you can use a credit card with points to reduce the cost of your treatments.

Navigation